5 Easy Fixes for a Door That’s Not Latching
A door failing to latch can seem like a minor problem, but little inconveniences can turn into bigger problems later if you put off fixing them. A door naturally starts to sag after constant use, causing the latch and strike plate to become misaligned. Most of the time, this is a quick and easy fix, but it can get more involved if the issue is severe.
If the door latch is not retracting far enough, the issue may lie with the latch mechanism that the doorknob controls—in which case the solutions get a little more complicated.
In this article, our locksmith team at Action Lock Doc focuses on simple fixes for when your door latch doesn’t line up with the strike plate.
Five Door Latching Issues and How to Fix Them
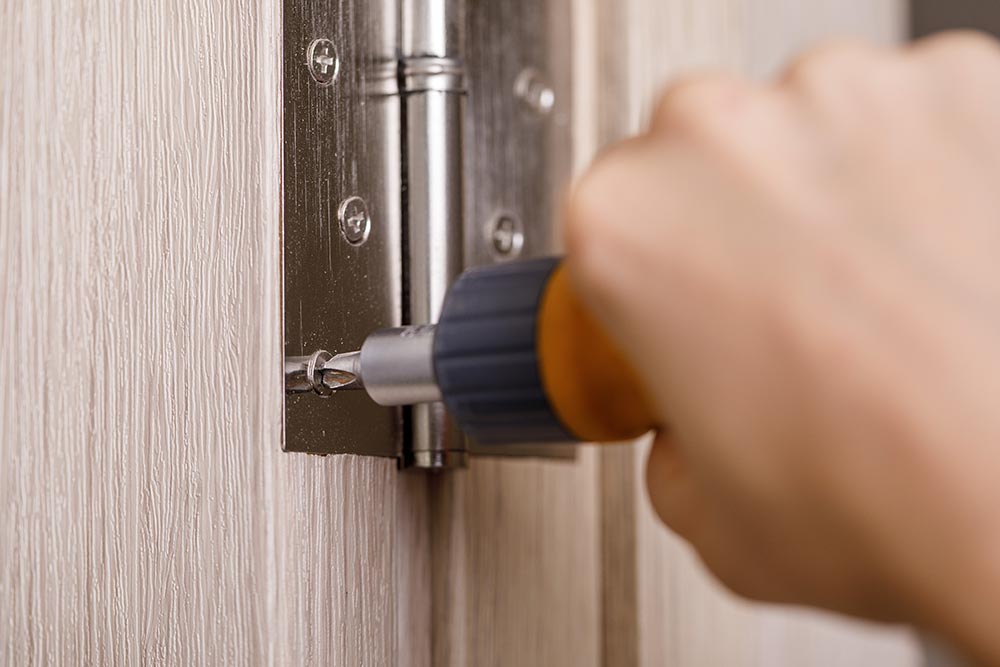
1. Loose Hinges
Over time, your door can start to sag as the hinges become loose in the door frame. If the door closes but does not latch, sagging hinges are likely your issue. This fix is as simple as it gets—and all you need is a screwdriver.
- Step 1: Use a screwdriver to tighten the hinge screws. If you tighten them too much, you could damage the door frame and worsen the door’s balance even more, so be gentle.
- Step 2: Close the door to see if it latches.
2. Unbalanced Door
If tightening the hinges didn’t fix the misalignment, you can adjust the door’s positioning another way. For this fix, you’ll need a drill and a 3-inch screw.
- Step 1: Remove a screw from the hinge on the door frame. You should choose the top hinge if the latch is too low or into the bottom hinge if it’s too high.
- Step 2: Drive a 3-inch screw into the hinge to replace the one you removed. The screw should help pull the door to the frame and align the latch with the strike plate.
Sometimes, the door not latching is so off-balance that it needs to be adjusted more drastically. To get your door level again, you can try shimming the hinges. You can accomplish this with a screwdriver and a small piece of cardboard or similar material.
- Step 1: Remove the hinges from the door frame.
- Step 2: Fit the small piece of cardboard into the hinge’s mortise: the hole in which the hinge rests in the door frame. The cardboard acts as a shim for the sagging hinges, so it will help level the door.
- Step 3: Replace the hinges and test if your door latches.
If adding a shim doesn’t correct the door’s misalignment, the hinge mortises may be the problem. You can try repairing the mortise yourself with a screwdriver and sandpaper.
- Step 1: Unscrew the hinges and remove them.
- Step 2: Use sandpaper to enlarge the mortise or level a particular side. You can wrap the sandpaper around a small dowel to make it easier.
3. Strike Plate That’s Too High
If the latch on your door is lower than the strike plate, you might be able to get the door to latch if you make a minor adjustment to the height of the strike plate. This fix requires a hammer and chisel.
- Step 1: Place your chisel on the strike plate’s edge.
- Step 2: Carefully hammer the chisel downward to lower the strike plate no more than ⅛ an inch.
4. Strike Plate Hole That’s Too Small
If the door latch is not catching, the strike plate hole may be too small for the latch. If you want to attempt enlarging the hole, you’ll need a screwdriver and a metal file.
- Step 1: Start by removing the strike plate from the door jamb with the screwdriver.
- Step 2: Put the file in the strike plate opening and file the metal down until it’s large enough for the latch to fit.
- Step 3: Replace the strike plate and test the latch.
5. Strike Plate That’s Not Lined Up With the Latch
If all else fails, and you still find your door not latching, you may need to reposition the strike plate completely. Fixing this issue is a longer process than the previous solutions and requires more tools and materials. You’ll need a drill, screwdriver, hammer, chisel, putty knife, pencil, and wood filler.
- Step 1: Use a screwdriver to remove the strike plate from the doorjamb.
- Step 2: Find a new spot for the strike plate. You’ll want to avoid overlapping with the original screw holes, so ensure the new position is at least ⅛ to 1/16 inches away from the holes.
- Step 3: Once the strike plate is lined up with the latch, hold it against the jamb and use the pencil to mark the new hole positions. The marks will make it easy to see where you need to start drilling.
- Step 4: With the pencil, draw a line along the edges of the strike plate to make it easier to chisel out the new spot for it to rest.
- Step 5: Fill in the old screw holes before you start drilling. Apply a small amount of wood filler to the holes with the putty knife. Wait for the filler to dry before proceeding.
- Step 6: Make a slight indentation on the spots you marked for the new screw holes using your hammer and chisel.
- Step 7: Use your drill, guided by your indentations, to make new 1/16-inch holes for the screws. To avoid damaging the doorjamb, you can start with a thin drill bit and work your way up drill bit sizes until you get 1/16-inch holes for the screws.
- Step 8: To widen where the strike plate rests in the jamb, use the hammer and chisel to remove the wood inside the marks you made earlier.
- Step 9: Reinstall the strike plate into its new position, and check if your door latches.
Call an Expert Locksmith in Richardson, TX
If your tried the above solutions but you’re still not satisfied, or if you would rather leave it to the professionals, call us if you live in the Greater Dallas-Fort Worth area.
At Action Lock Doc, we are a locksmith company providing the DFW area with 24-hour emergency locksmith services for commercial, residential, and automotive locks. If you have a broken lock that needs repair or you desire any other locksmith services, call us today at (972) 690-4431.

Joe, a former CIO and tech industry professional, has made it his mission to secure Dallas-Fort Worth (DFW) through the Action Lock Doc, Dallas Safe and Vault, and Summa Security brands. When he’s not running the show at the office, you’ll find him writing about commercial and residential locksmithing, access control, and safes.